Holidays Node
The Holidays node, under Holidays and Weekends in the Workflow Administration Console, lets you define what days Workflow will observe as holidays. These days will be taken into consideration by the Exclude weekends and holidays option in the Route Entry to Folder, Route Entry to Group, Route Entry to User, Deadline, Escalation, and Delay activities.
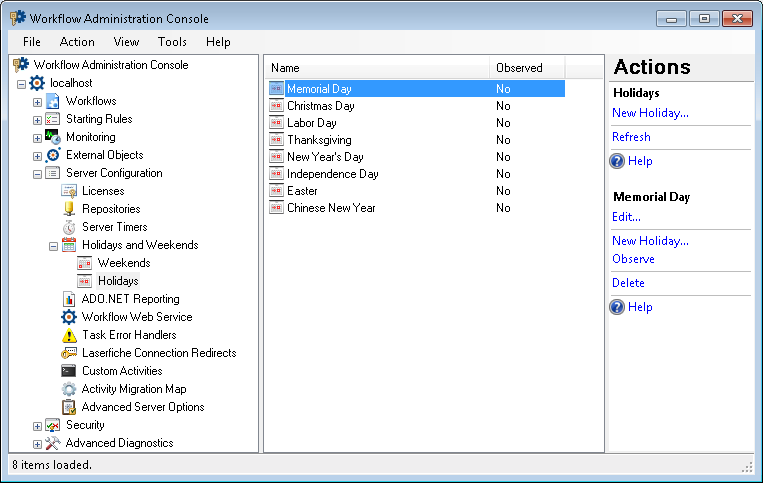
To open the Weekends node
- In the Workflow Administration Console's Console Pane, expand the Server Configuration node.
- Expand the Holidays and Weekends node.
- Select Holidays.
Tip: You can refresh the Holidays node to reflect recent changes by clicking the Refresh link below Holidays in the Actions Pane. Alternatively, right-click the Holidays node and select Refresh.
To add a holiday
- In the Console Pane, select the Holidays node.
- Click New Holiday in the Actions Pane. Alternatively, right-click the Holidays node or an existing holiday and select New Holiday.
- In the
 Add New Holiday dialog box, name the holiday.
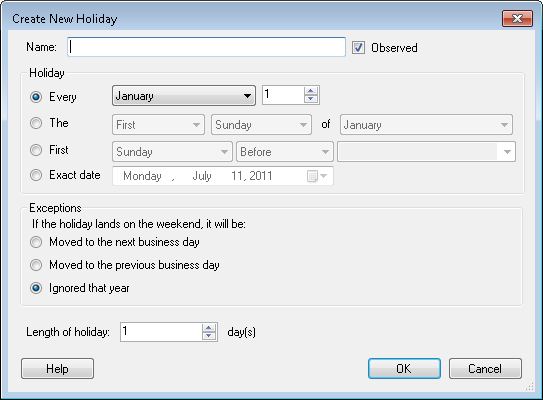
- Select the Observed option to have Workflow take this holiday into account when adjusting dates. Clear the Observed option to have Workflow ignore this holiday.
- Under Holiday, define when the holiday begins. You can configure the holiday for a certain day of a month, for a specified day before or after another holiday, or for an exact date.
- Under Exceptions, select what should happen if the holiday falls on a weekend.
- Define the length of the holiday.
- Click OK.
To modify a holiday
- In the Console Pane, select the Holidays node.
- Select the holiday you want to modify in the center Details Pane.
- Click Edit in the Actions Pane, or double-click the holiday.
- Configure the holiday's settings in the Edit Holiday dialog box. See the To add a holiday section above, starting at step 4, for the options available in this dialog box.
- After making the desired changes, click OK.
Note: Some settings are disabled for the default Chinese New Year and Easter holidays. Workflow uses a complex formula based on the lunisolar calendar to calculate when the Chinese New Year will be each year, and it bases the Easter holiday on the Gregorian (Western Christianity) calendar. You can change the number of days each of these holidays is observed but not when they will occur. If you want Workflow to observe either of these holidays on a different day, you can disable the default holiday and create a new holiday.
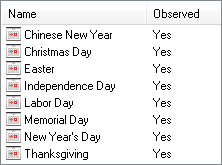
To enable/disable a holiday
- In the Console Pane, select the Holidays node.
- Select the holiday you want to enable or disable in the center Details Pane.
- In the Actions Pane, click Observe to enable the holiday or click Ignore to disable the holiday. Alternatively, double-click the holiday and select or clear the Observed option in the Edit Holiday dialog box.

To delete a holiday
Note: You cannot delete the default Chinese New Year and Easter holidays. If you do not want Workflow to observe one of these holidays, you can disable the holiday by following the instructions above.
- In the Console Pane, select the Holidays node.
- Select a holiday you created in the center Details Pane.
- Click Delete in the Actions Pane, or right-click the holiday and select Delete.
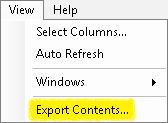
To export the contents of this node in a .csv, .xml, or .txt file
- Select the node in the Console Pane.
- Select View from the main menu.
- Click Export Contents.
- In the Export data dialog box, name the exported file.
- Select CSV File, XML File, or Tab Delimited Text File from the drop-down menu.
- Click Save.